Cycle.js Quick Start with Node.js, Babel, and Browserify in Visual Studio Code
I wish to make it clear that I am extremely interested in new technologies, libraries, paradigms, and patterns. Cycle.js quickly caught my…
I wish to make it clear that I am extremely interested in new technologies, libraries, paradigms, and patterns. Cycle.js quickly caught my eye as I was going through material about Redux’s prior art. Let’s just get things started quickly.
NOTE: Since most of the tooling and platform used are cross-platform, I will be referring to the “shell” often. This means Command Prompt on Windows, Terminal on MacOS, and Bash on Linux-based systems.
Prerequisite: Visual Studio Code
The open source, cross-platform code editor from Microsoft
Visual Studio Code is a source code editor developed by Microsoft for Windows, Linux and OS X. It is free and open-source, and includes support for debugging, embedded Git control, syntax highlighting, intelligent code completion, snippets, and code refactoring. It is also customizable, so users can change the editor’s theme, keyboard shortcuts, and preferences. You can get it from here.
I love what Microsoft is trying to do for the open source and cross platform world. .NET Core was one thing, and Visual Studio Code is another. So we are going to work with Visual Studio Code for this project. Once you have it installed, it’s time to move ahead to the next step.
Prerequisite: Node.js and Node Package Manager (NPM)
The javascript runtime and the package manager used by CycleJS
If you don’t have node.js installed, head to the Node.js Downloads page and download and run the respective installer.
If you already have node.js installed, you likely have the npm installed too. Let’s just make sure the versions are up to date. Open your command prompt, and type node -v and press Enter. This gets you the node version. Type npm -version to get the version of the npm installed. I recommend getting the highest versions (node.js v6.2.1 and npm v3.9.3 as of writing).
Creating a new Node.js application
The boilerplate and scaffold for a node.js application
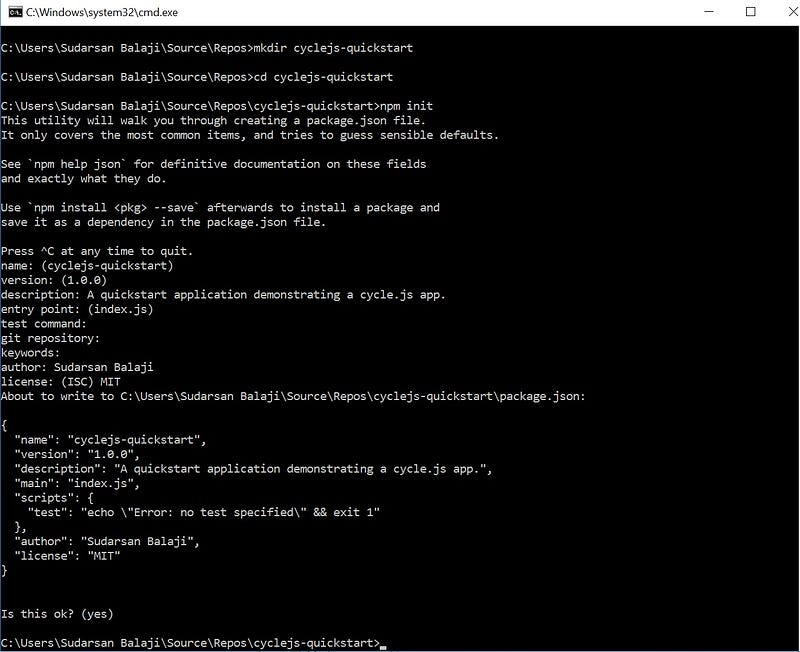
Now that we have what we need to create a node.js application, let’s go ahead and create a new node.js application. We need to start this by opening up the shell and then typing the following code:
We basically create a new directory called cyclejs-quickstart, navigate into it, and call npm init to scaffold a new node.js application. You can fill in the details like the application name, description, license, etc.
Here’s a screenshot of what went on in my shell:
NOTE: The screenshots may be from a Windows system, but rest assured that the actions and outputs will be the same, or extremely similar, across operating systems.
Setting up node package dependencies
Adding the npm configuration and pulling packages
Don’t close the shell yet, we still have work to do. Specifically, we need to pull in packages that we need. To install packages, npm gives us the npm install command, which has nifty — save and — save-dev optional arguments which are going to help us out a lot here.
There are two types of dependencies for a node.js application: development dependencies, needed for development alone, and need not be deployed with the app as source, and dependencies, which are needed for the app to function, and are deployed with the app as source code.
The dependencies we have are cycle.js, its DOM driver, and RxJS. Basically we need to install these three packages as dependencies, and save them to the packages.config file. To install these (the installation might take some time), we need to type the following code in the shell:
Now that the dependencies are done, we need to install the development dependencies. We will be using
- Babel for advanced JavaScript features from ES6 and above
- Browserify to import modules like a server side script in client side scripts
- Babelify to include babel transformations in our browserify processing
- Watchify to watch for changes and do browserify processing
- Concurrently to run concurrent processes from npm scripts
- Lite Server to quickly spin up a lightweight server for our needs
- and a couple of babel plugins which will help in our quest
To install these, type the following code in the shell, and wait for the packages to be installed as development dependencies, and for them to be added as such to the package.json:
We’re installing a number of packages here, and it could take some time, so be patient. Once all this is done, we are ready to start working with our project in Visual Studio Code!
Setting up Babel and Browserify
Automatically converting ES6 to ES5, and importing modules
Don’t close the shell yet, or if you have, reopen it with the project directory we just named as cyclejs-quickstart as the working directory. From here, in the shell, we can open the folder for editing in Visual Studio Code with the command:code .
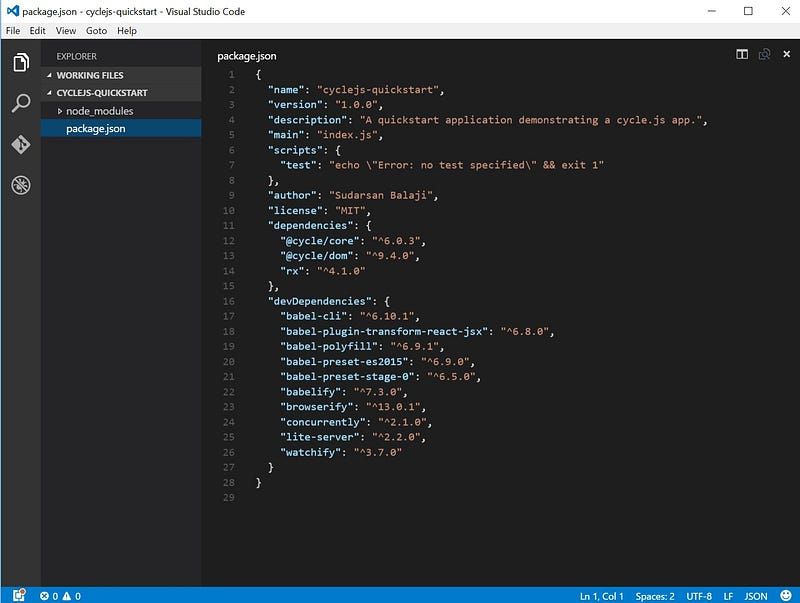
It’s time to add a few scripts, so open the package.json file from the Explorer pane on the left, in Visual Studio Code. You should see something like the one above. Erase the scfipts key already present, and instead replace it with this:
We just added a script called dev, which creates a light-weight server listening on port 3000 in localhost or 127.0.0.1, and concurrently watches the file named main.js, to browserify it after applying babel transforms using the babel presets es2015 and stage-0. We also added a script called start which basically runs the dev script. We also added a few keywords in the process.
We have to add a file called .babelrc with the following contents, to finish configuring babel for our node.js application:
Creating the Single Page Application (SPA)
The first page of the application is also the only page
Do you remember that we referenced a file called main.js in the scripts? It’s time to add that file now, along with the only page of the application.
Running your first Cycle.js application
You didn’t think it was gonna be any harder, did you?
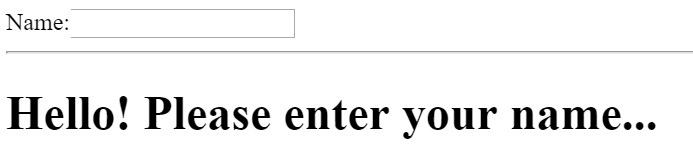
All you have to do now is open up the shell and type the command:npm start
The lite-server will start running, your main.js will be processed into a bundle.js which we load in the index.html, and then a browser with localhost:3000 will open up, so that you can see the output:
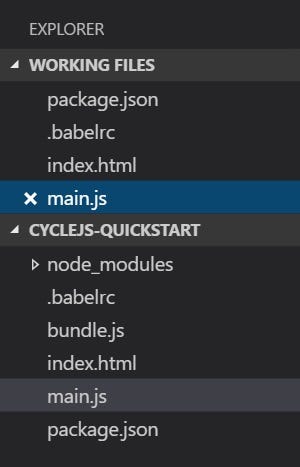
For your reference, this is how the folder structure looks in Visual Studio Code right now:
Did this work for you? Could I have done something better? Have I missed something? I plan to have a follow up post too, a kind of a deep dive into Cycle.js. I’d love to hear your thoughts on that, too! Please use comments to place your feedback, suggestions, whatever you feel like sharing.
Cheers!